


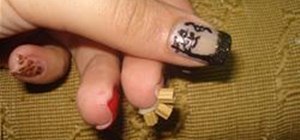
Love4Nails teaches viewers how to paint nails with a blue, white and gold nail art design! First, you need to apply your background color. This color will be a blue nail color. You should let this dry. Now, take a black nail art polish and do 3 stripes, that start at the bottom corner and go up slanted. You do not have to go all the way to the top. Next, get a white nail art polish and start the stripes at the opposite corner and paint two across - these two stripes will touch at the corner. Next, get gold polish and fill in the entire area that is to the top of the first white stripe. Next, dab some black polish on paper and with a nail dotter, make black dots in between the two white lines. Next, dab white polish on your paper and in the middle of the black dots, put smaller white dots. Next, add four white dots in between the black lower lines. Now, with fresh black polish, dot black in the middle of the white dots or with the blue color, your choice. On the gold area, make black and white dots. Overlap these dots with each other. In the middle of these dots, dot the middle with your blue polish color. Now, using black, make tiny dots all around the top and continue down to the very corner. Now, let this dry and cover with a clear base!
Just updated your iPhone? You'll find new emoji, enhanced security, podcast transcripts, Apple Cash virtual numbers, and other useful features. There are even new additions hidden within Safari. Find out what's new and changed on your iPhone with the iOS 17.4 update.


Be the First to Comment
Share Your Thoughts